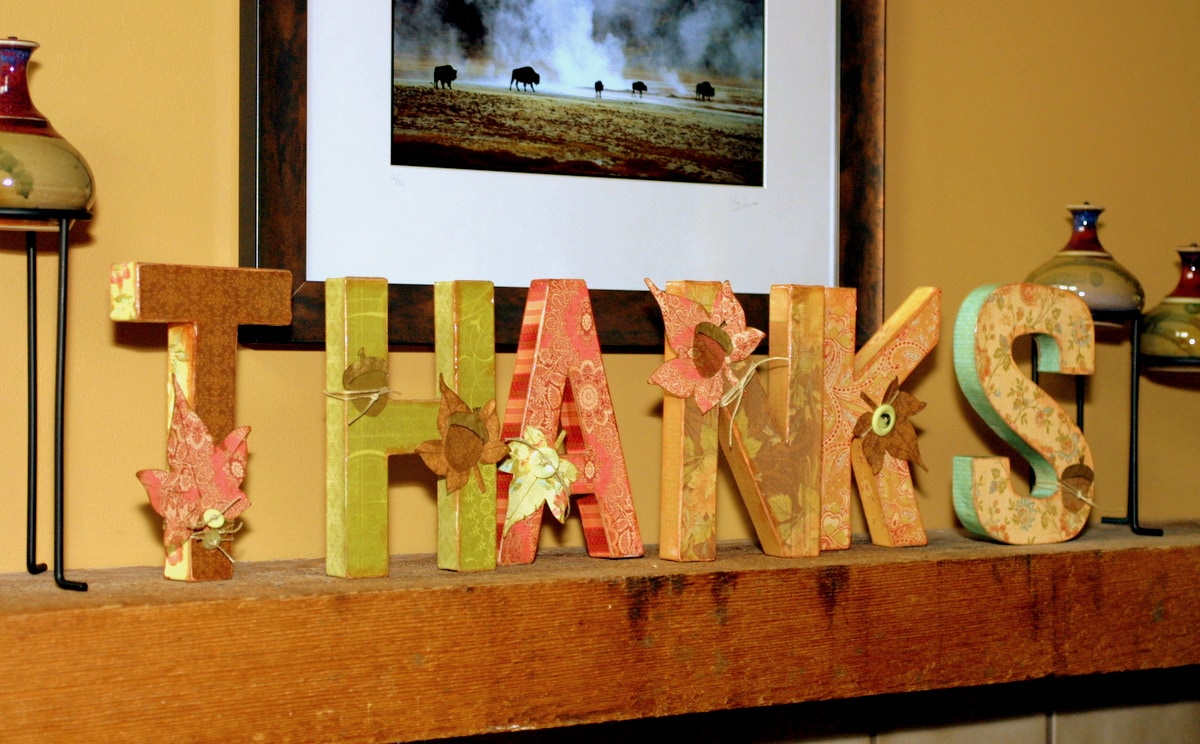
Easy-to-find craft materials come together to make this simple, seasonal and meaningful Thanksgiving home decor.
It all starts with papier-mâché letters that you can pick up at a craft store or online. From there, just add your own brand of creativity!
“The acorns are the pièce de résistance, though,” says Stacy Brunner, creator of the project shown here. “The meaty part is cut from rusty metal mesh. The hat part is cut from a piece of gold embossed paper. They are really cool.”
How to make this Thanksgiving letter craft home decoration
Supplies for this fall craft project
___ 6 plain papier-mâché letters: T H A N K S (or any combination you like)
___ Patterned scrapbooking papers in several styles (you can download some free wrapping paper styles here)
___ Metal mesh
___ Gold embossed paper
___ Buttons
___ Raffia, string and/or ribbon
___ White glue and/or Mod Podge
Quick overview: The materials and the project
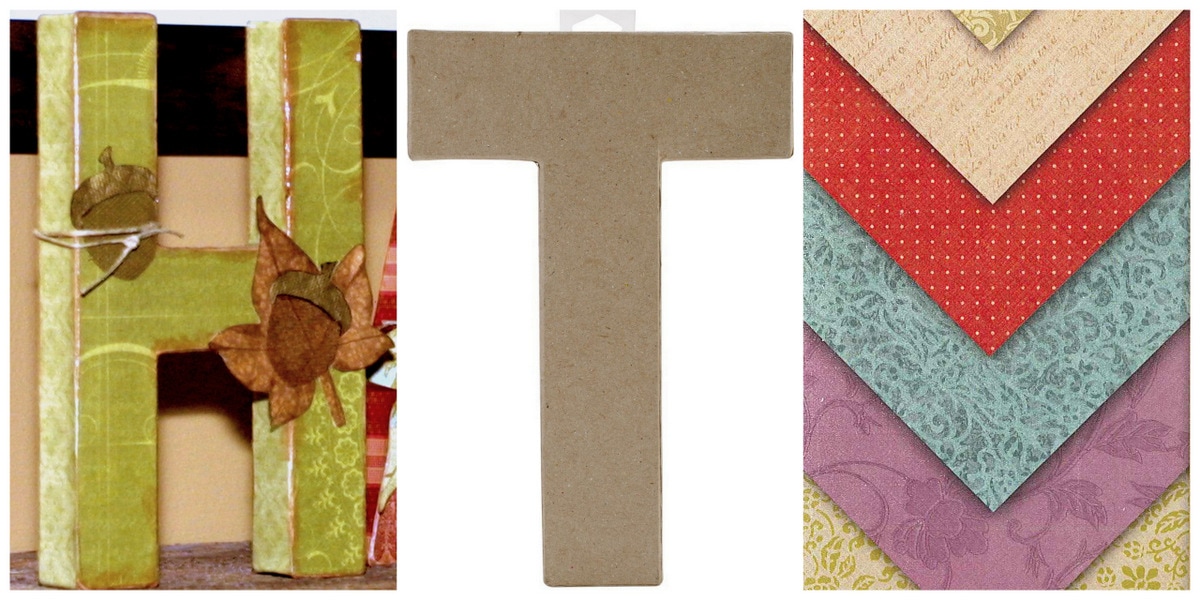
This Thanksgiving project can, of course, be adapted for any occasion or holiday — and you can even decorate single letters (such as initials) to give to friends and family.
Instructions for creating the autumn letters
Create a template by outlining each letter on a piece of plain paper. With the template, cut out patterned or colored scrapbooking paper in the same size or slightly smaller. Glue the scrapbooking paper onto the front of each letter. Cover the sides and/or tops of letters with a paper design of your choice, if desired.
When the glue has dried, seal each letter with a couple of coats of Mod Podge, glue or similar. (A waterproof matte finish is suggested.)
Cut the leaf shapes out of patterned paper (using real leaves as templates if you like). Fold or ruffle them slightly and ink around the edges if you want to give them a more realistic or rustic look.
Put each one on waxed paper and paint over each one with a sealant to help them maintain shape and color and to resist dust when on display. Once they are dry, glue on buttons and attach string, ribbon, raffia, etc. as desired.
Make the acorns by cutting out the cup portion (the bottom) from metal mesh — a little rusty if possible. Cut the acorn cap (top) from a piece of gold embossed paper. (Alternatively, you can create the acorns as you did the leaves, but use two different colors for the cup and the cap.)
When the seal coat on the letters is completely dry, lay them flat and use glue to affix the leaves and acorns to the letters as desired. Be sure to allow the glue to dry completely before you set the letters upright.
With thanks for the creativity of Stacy Brunner


